There’s no doubt that dealing with a KitchenAid dishwasher incapable of draining properly can be incredibly frustrating and inconvenient. However, before going through the hassle of contacting professionals for expensive repairs, take a moment to explore possible solutions on how to fix this problem yourself.
fix-kitchenaid-dishwasher
In this user-friendly guide specifically catered towards those facing drainage issues with their KitchenAid dishwashers; we will take you through simple troubleshooting steps while addressing common causes like clogged drains or defective pumps. By following our comprehensive instructions, not only will you effectively identify and resolve the problem at hand; but also save time and money by avoiding professional assistance entirely.
We’ll walk you through vital steps such as examining your waste disposal system, clearing out any blockages from filters along with inspecting all drain hoses in detail – all while ensuring proper installation of air gaps is confirmed. Additionally, we’ll provide valuable advice on taking precautions throughout the process to ensure personal safety is maintained at all times.
Upon completing this guide successfully; you’ll be equipped with both knowledge and confidence necessary for tackling typical drainage issues encountered within your KitchenAid dishwasher.
dishwasher-drainage-issues-fix
Table of Contents
Check The Garbage Disposal
- Start by turning off the power to the garbage disposal. This ensures your safety during the inspection process.
- Look for any visible signs of blockages or debris in the disposal. You may notice food particles, grease, or other materials that could be causing the problem. Use a flashlight if needed to get a better view.
- If you notice any blockages, remove them carefully using long-handled tongs or pliers. Avoid using your hands to prevent injuries.
- Once the blockages are removed, run cold water through the disposal to flush out any remaining debris. Allow the water to flow freely to ensure there are no further obstructions.
- Turn the power back on to the garbage disposal and test the dishwasher to see if it drains properly.
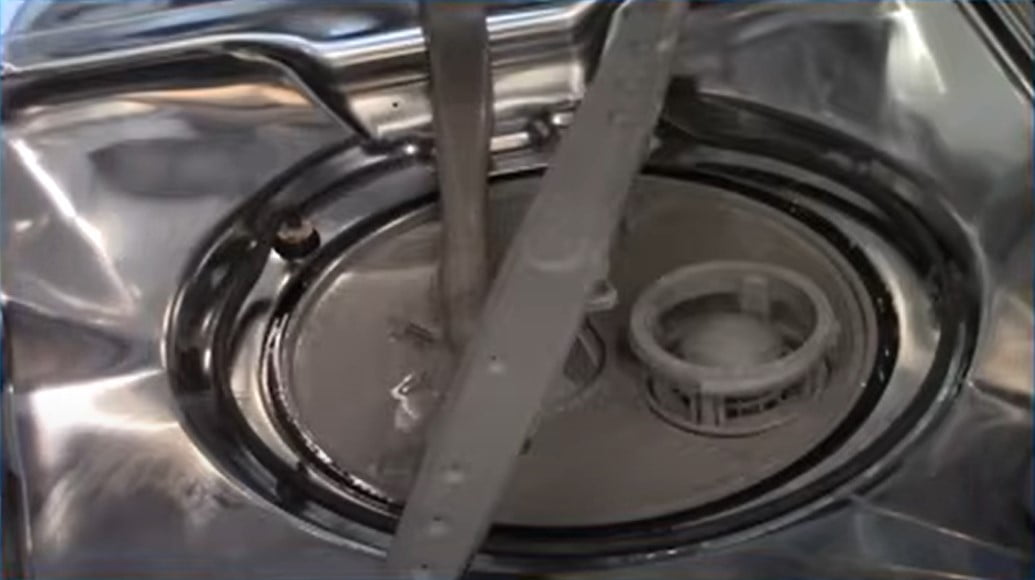
Clean The Filter
- Locate the filter: In most KitchenAid dishwasher models, the filter is situated at the bottom of the dishwasher, either on the floor of the tub or beneath the lower spray arm. To access the filter, remove the lower dish rack.
- Remove the filter: Depending on your dishwasher model, the filter may be removable or self-cleaning. If you have a removable filter, carefully lift it out of its housing. If you have a self-cleaning filter, follow the manufacturer’s instructions for cleaning.
- Rinse the filter: Take the filter to a sink and rinse it thoroughly under running water. Use a soft brush or sponge to gently scrub away any accumulated debris or residue. Pay close attention to the mesh or screen part of the filter, ensuring it is free from any obstructions.
- Check for damage: While cleaning, inspect the filter for any signs of damage or wear. If you notice any cracks, tears, or significant wear, it may be necessary to replace the filter.
- Reinstall the filter: Once the filter is clean and in good condition, carefully place it back into its housing. Ensure it fits snugly and securely.
Cleaning the filter regularly, ideally, every few weeks or as recommended by the manufacturer, can help maintain optimal dishwasher performance. It ensures that the water drains efficiently and prevents the accumulation of debris that can cause blockages.
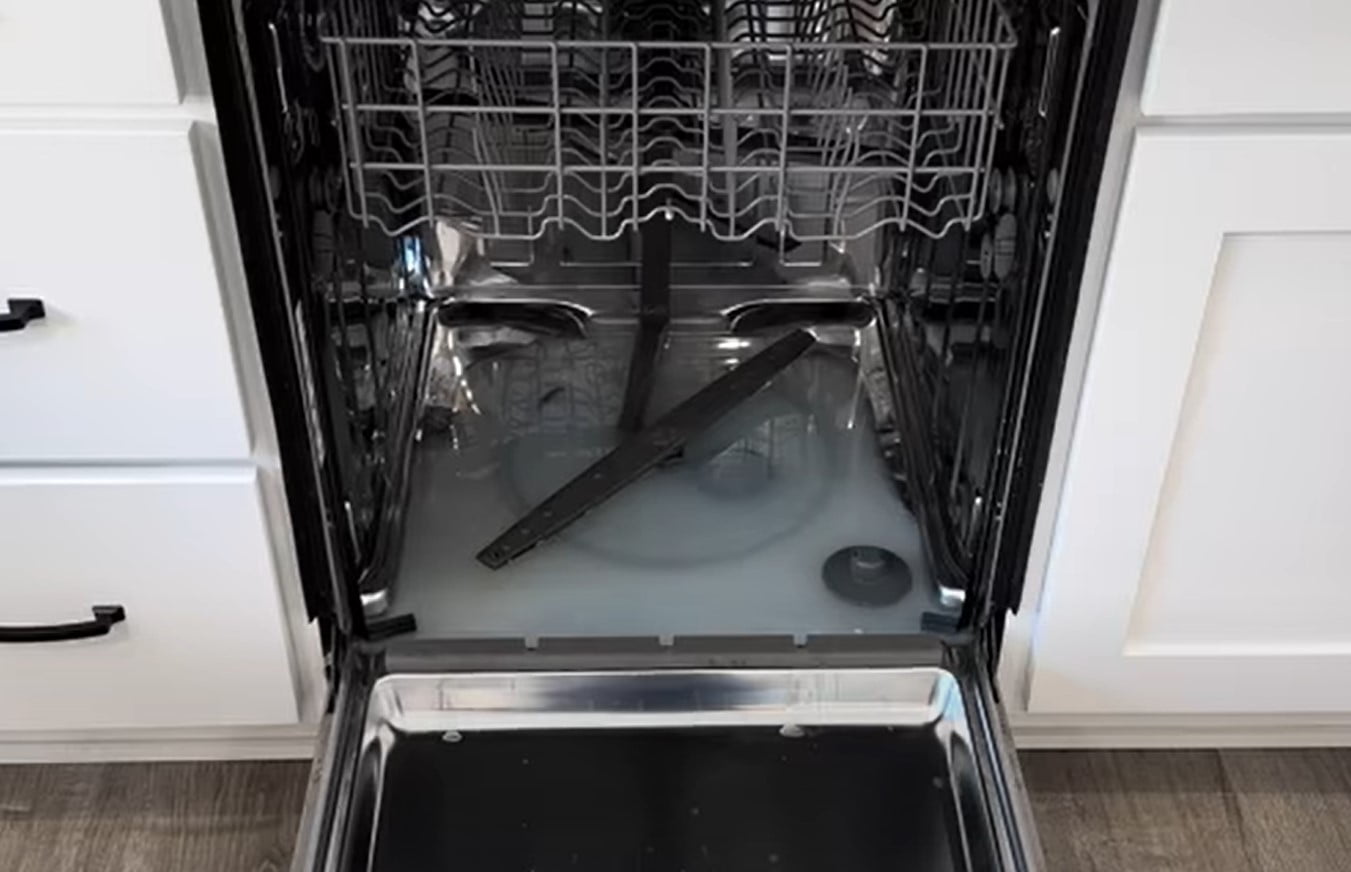
Inspect The Drain Hose
- Turn off the dishwasher: Before inspecting the drain hose, ensure that the dishwasher is turned off and disconnected from the power source to avoid any potential accidents.
- Locate the drain hose: The drain hose is typically located at the back of the dishwasher. It is a flexible hose made of rubber or plastic and is connected to the dishwasher’s drain pump.
- Check for clogs: Examine the drain hose for any visible clogs or blockages. Look for debris, food particles, or other objects that may be obstructing the flow of water. If you notice any clogs, remove them using a long brush or by flushing water through the hose with moderate pressure.
- Inspect for kinks or bends: Ensure that the drain hose is not kinked or bent, as this can restrict water flow. Straighten out any kinks or bends in the hose to allow for smooth drainage.
- Verify proper installation: Check that the drain hose is properly connected to the dishwasher’s drain pump and the sink drain or garbage disposal. Ensure that the hose is securely fastened and free from any leaks.
- Test for proper drainage: After inspecting the drain hose, run a short cycle on your dishwasher and observe if the water drains properly. If the issue persists, you may need to further investigate or seek professional assistance.
FAQS
Why is my KitchenAid dishwasher not draining?
There are a few reasons why your KitchenAid dishwasher might not be draining. Here are some of the most common reasons:
● The drain pump is clogged. This is the most common reason for a dishwasher not draining. The drain pump is responsible for pumping water out of the dishwasher after the wash cycle is complete. If the drain pump is clogged, it will not be able to pump the water out, and the dishwasher will not drain.
● The float switch is stuck. The float switch is a sensor that tells the dishwasher when to stop filling with water. If the float switch is stuck, it will not tell the dishwasher to stop filling, and the dishwasher will overflow. This can also prevent the dishwasher from draining.
● The drain hose is kinked or blocked. The drain hose is the hose that carries water from the dishwasher to the drain. If the drain hose is kinked or blocked, it will not be able to drain the water out of the dishwasher.
● The filter is clogged. The filter is located at the bottom of the dishwasher and catches food particles and other debris. If the filter is clogged, it will not be able to catch food particles and debris, and they will eventually clog the drain pump.
What is the main cause of the dishwasher not draining?
The main cause of dishwasher not draining is a clogged drain pump. The drain pump is responsible for pumping water out of the dishwasher after the wash cycle is complete. If the drain pump is clogged, it will not be able to pump the water out, and the dishwasher will not drain.
How do I test my KitchenAid dishwasher drain pump?
To test your KitchenAid dishwasher drain pump, you can follow these steps:
1. Unplug the dishwasher.
2. Remove the lower kickplate.
3. Locate the drain pump.
4. Disconnect the drain hose from the drain pump.
5. Turn on the dishwasher and listen for the drain pump to turn on.
6. If you do not hear the drain pump turn on, the drain pump is likely clogged.
7. To clear the clog, you can use a straightened paper clip to clear the debris from the drain pump impeller.
8. Once the clog is cleared, reconnect the drain hose and plug in the dishwasher.
What is the most common problem with a KitchenAid dishwasher?
The most common problem with a KitchenAid dishwasher is a clogged drain pump. This is followed by a clogged filter and a stuck float switch.
How do I reset a KitchenAid dishwasher?
To reset a KitchenAid dishwasher, you can follow these steps:
1. Unplug the dishwasher.
2. Wait for 5 minutes.
3. Plug in the dishwasher.
4. Turn on the dishwasher.
The dishwasher will now be reset and should start working properly.
Conclusion
In conclusion, learning how to fix a KitchenAid dishwasher that is not draining is a valuable skill that can save you time, money, and frustration. By following the troubleshooting steps outlined in this guide, you can identify and resolve common issues that may be causing the drainage problem.
Remember to start by checking the garbage disposal, as a clog or blockage in this area can impact the dishwasher’s ability to drain properly. Cleaning the filter is another important step, as it helps prevent debris from obstructing the drain. Inspecting the drain hose for clogs, kinks, or improper installation is also crucial in ensuring smooth water flow.